In Winter ’18 Salesforce released a new lightning component lightning:fileUpload, which provides an easy and integrated way for users to upload multiple files. The file uploader includes drag-and-drop functionality and filtering by file types.
File Upload Component Limits:
- By default, you can upload up to 10 files simultaneously unless your Salesforce admin has changed that limit.
- The org limit for the number of files simultaneously uploaded is a maximum of 25 files and a minimum of 3 files.
- The maximum file size you can upload is 2 GB. In Communities, the file size limits and types allowed follow the settings determined by community file moderation.
Considerations:
- This component is not supported in Lightning Out or standalone apps, and displays as a disabled input.
- The file uploader cannot be used to upload files with the following file extensions: .htm, .html, .htt, .htx, .mhtm, .mhtml, .shtm, .shtml, .acgi, .svg.
In this article I will show you how you can upload multiple files using lightning file upload component, without writing the apex code.
FileUpload Component:
Create a new Lightning Component FileUpload.cmp.
<!--FileUpload.cmp-->
<aura:component controller="FileUploadController" implements="force:appHostable, flexipage:availableForAllPageTypes, flexipage:availableForRecordHome, force:hasRecordId, forceCommunity:availableForAllPageTypes, force:lightningQuickAction" access="global">

    <lightning:fileUpload label="Upload File" multiple="true" accept=".pdf, .png" recordId="{!v.recordId}" aura:id="multifileUpload" onuploadfinished="{!c.handleUploadFinished}" />
</aura:component>
FileUpload JavaScript Controller:
Now create below JavaScript FileUploadController.js controller for above FileUpload.cmp component.
({
    handleUploadFinished: function (cmp, event) {
        //Get the list of uploaded files
        var uploadedFiles = event.getParam("files");
        //Show success message – with no of files uploaded
        var toastEvent = $A.get("e.force:showToast");
        toastEvent.setParams({
            "title": "Success!",
            "type" : "success",
            "message": uploadedFiles.length+" files has been uploaded successfully!"
        });
        toastEvent.fire();

        $A.get('e.force:refreshView').fire();

        //Close the action panel
        var dismissActionPanel = $A.get("e.force:closeQuickAction");
        dismissActionPanel.fire();
    }
})
Steps to test the functionality:
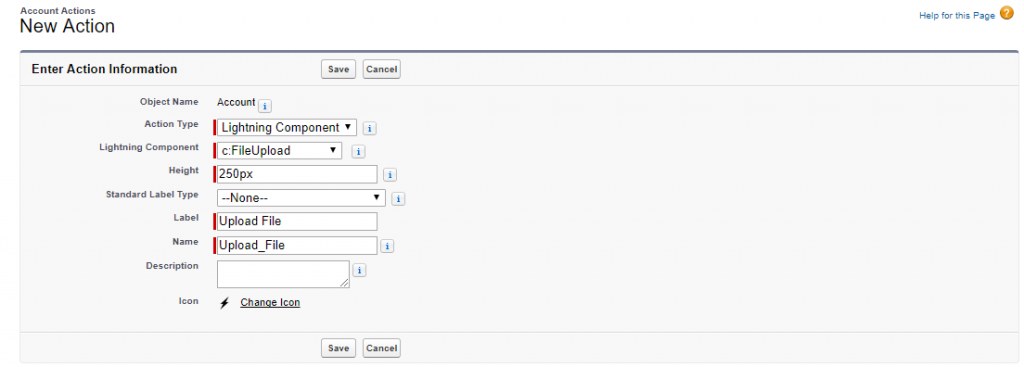
Go to Setup || Object Manager || Select Object(For example Account) || Buttons, Links, and Actions || New Action || Create Quick Action
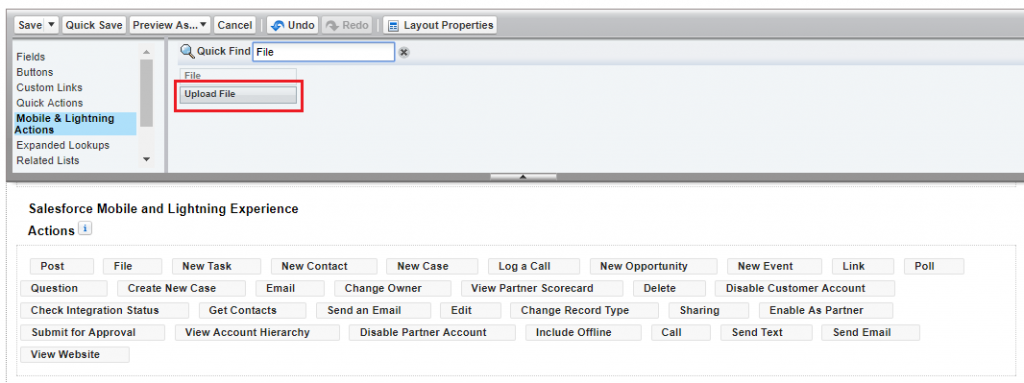
Now add the created Quick Action into Object Page Layout.
Go to Setup || Object Manager || Select Object(For example Account) || Page Layouts || Select Your Layouts (For example Account Layout) || Select Mobile & lightning Actions || Add the Quick Action into Salesforce Mobile & Lightning Experience Actions section.
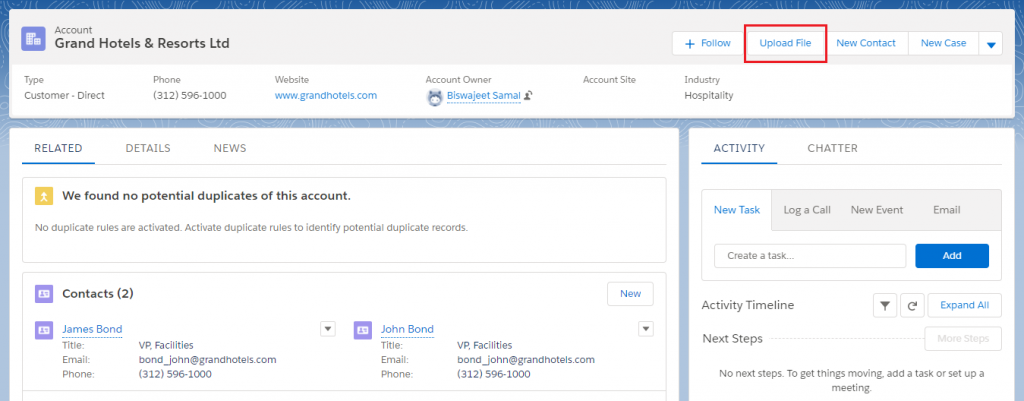
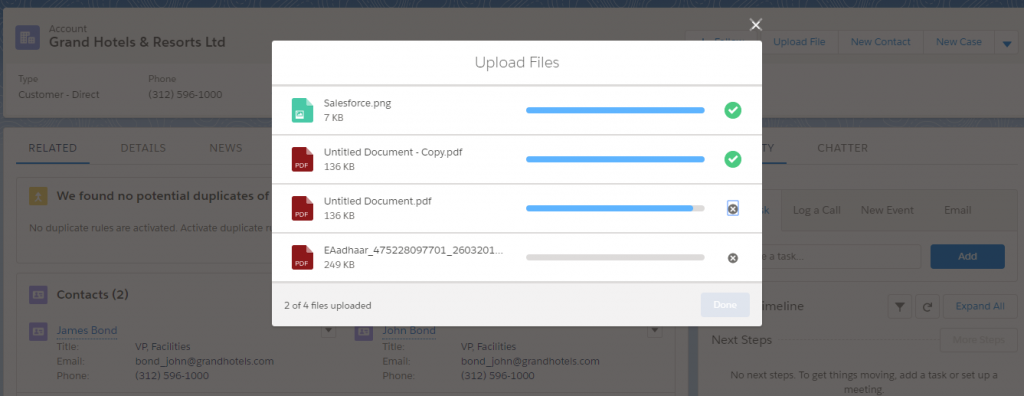
Now, Open an account record click Upload File action from right upload files and try to upload file.


