We can use SOQL in java-script on Visual Force pages or we can get it executed on click of a button or link present on detail page of a record. Below is the simple example of SOQL query in javascript on click of a button: Javascript code:
{!REQUIRESCRIPT("/soap/ajax/24.0/connection.js")}
{!REQUIRESCRIPT("/soap/ajax/24.0/apex.js")}
try{
var query = "SELECT Id,Name from Contact LIMIT 1";
var result = sforce.connection.query(query);
var arrayResult = result.getArray('records');

if(arrayResult.length == 0){
alert('There is no Contact');
}
else{
var contactName = arrayResult[0].Name;
alert(contactName);
}
}
catch(e){
alert('An error has occured');
}
To create a modal dialogue box in visualforce page follow below steps.
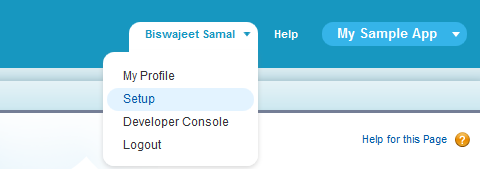
Login to your Salesforce.com developer account.
Click “Setup” in the upper right corner.
Under the App Setup section (left menu), expand Develop.
Click on Apex Classes.
Click the “New” button to create a new Apex Class.
Add the following source and click the “Save” button.
public class TestPopup{
    public boolean DisplayPopup {get; set;}

    public void ClosePopup() {
        DisplayPopup = false;
    }

    public void ShowPopup() {
        DisplayPopup = true;
    }
  }
Click on Pages (below Apex Classes on the left menu).
Create a new Visualforce page by clicking the “New” button.
For the purpose of this tutorial I used “TestPopupPage” for my Label & Name.
Enter the Visualforce Markup code below and click “Save”.
Now, to view the created visualforce page, you’ll need to go up to the browser address bar and navigate to the apex directory in your Salesforce.com account and type in the page name.
For me, that is the following: https://na3.salesforce.com/apex/TestPopupPage
or, you can create a new tab for this visualforce page, and can view it on click of the new created tab.
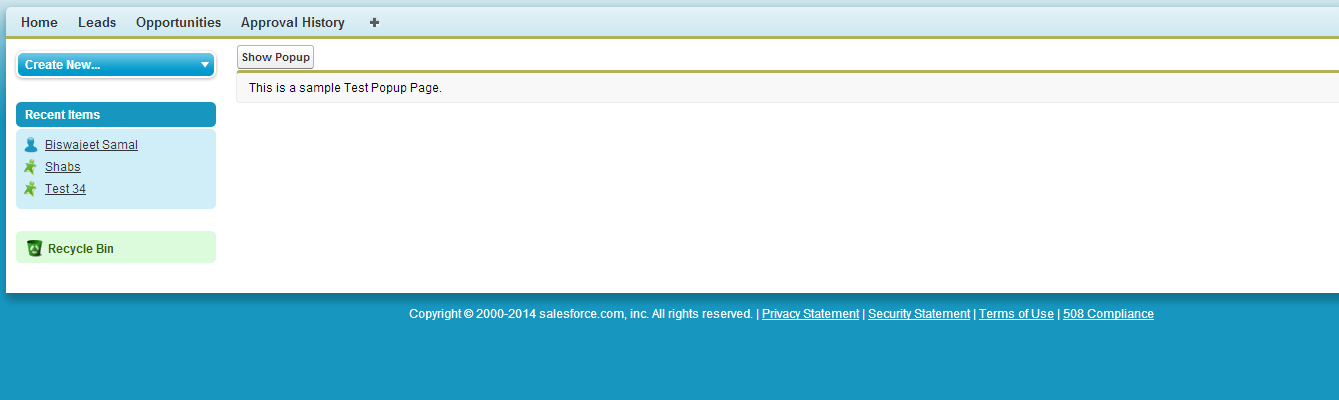
Here is the output comes up:
Created Visualforce Page:
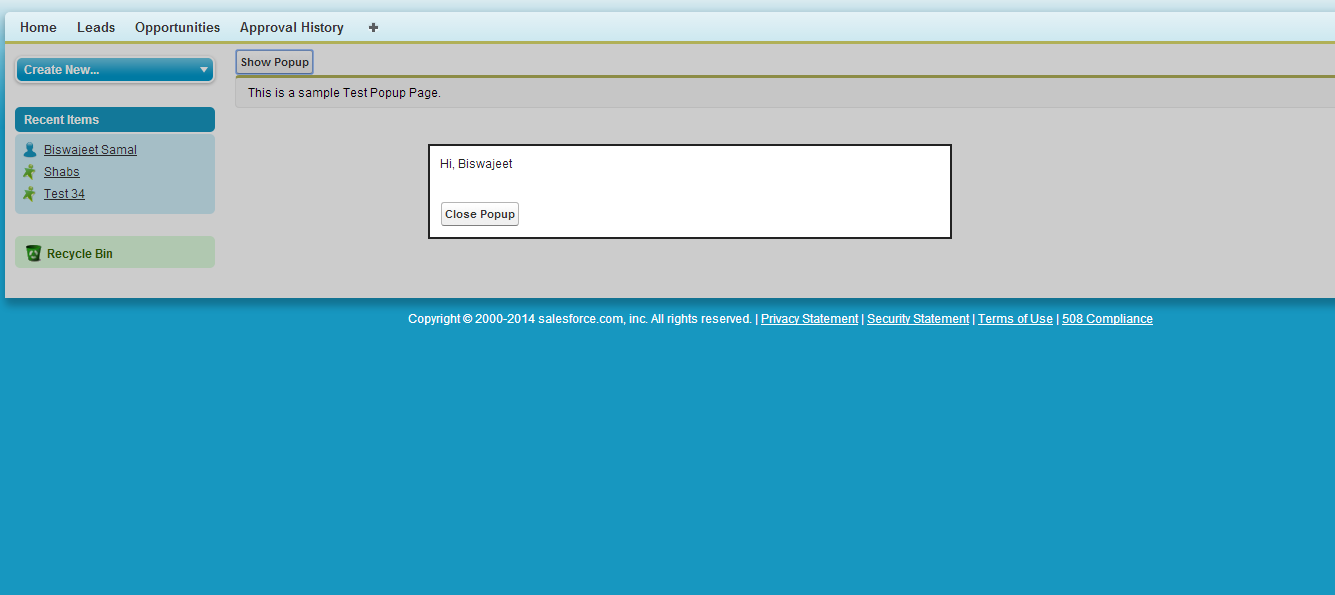
After click on the button, modal popup is displayed:
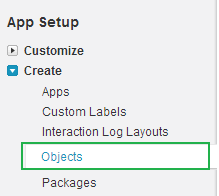
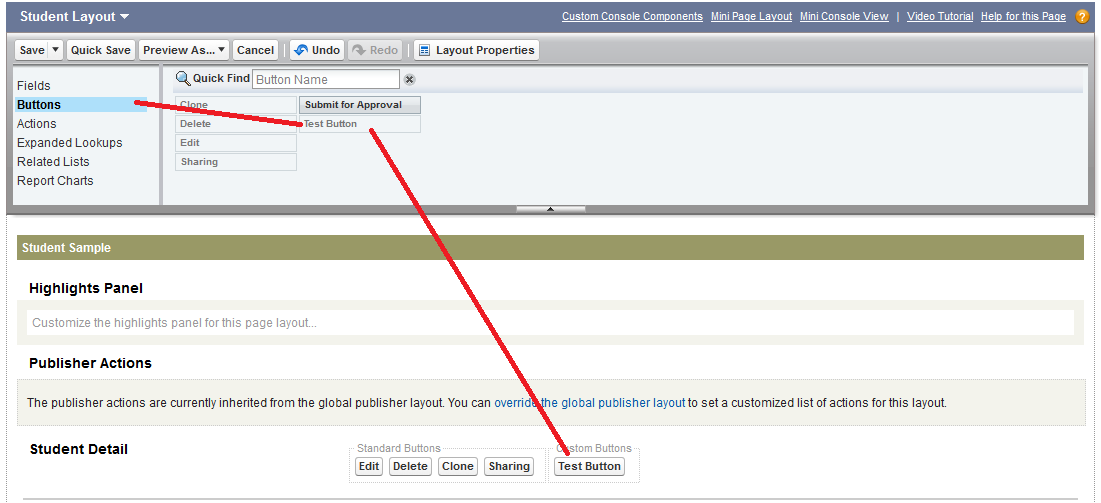
To create a new custom button go to “Your Name” > Setup > Develop > objects and click the object on which you want to use custom button. Step 1:
“Your Name” > Setup
Step 2:
Develop > Objects
Step 3:
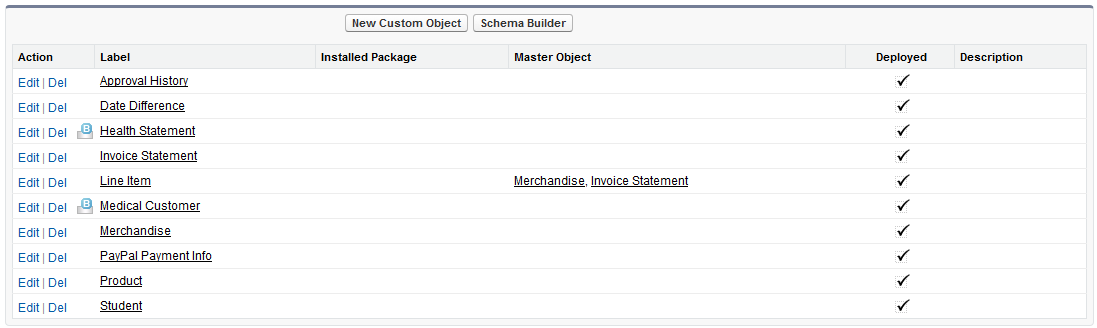
Now you can see the list of all custom objects. Select the object where you want to create a new custom button.
Step 4:
Now you can see the custom object page. Scroll down to the (Buttons, Links, and Actions) section and click on the New Button or Link.
Step 5:
At the next page you need to define some parameters for the custom button. Very important is that you selects Detail Page Button radio button. In this example i have selected Execute Javascript for the behavior, you can adjust it as you want. Now click on Save.
Step 6:
Now the “Test Button” is in button list.
Step 7:
At the next page click on the Back to Custom Object: Your Object Name to go back to the custom object page.
Now you have to insert your new custom button to the page layout to be able to see it. Scroll down to the Page Layout section and click on Edit link.
At the layout page select Buttons at the left top corner and the click and drag your custom button to the layout.
Now save the layout and then go to the custom object item page to see your new created custom button.
To create a new VisualForce page go to “Your Name” > Setup > Develop > Pages and click the New button.
Your Name” > Setup
Develop > Pages
New Page Button
You will now see the VisualForce page creation wizard. The very first thing you will want to do is give your new VisualForce page a Label. A label is a more esthetic name of what your page name will actually be.
Once you’ve typed your page label press the Tab key to set your cursor to the Name field. You will notice that the Name automatically took the value of “Test Page” from Label. SalesForce won’t allow you to have spaces in the name so replace your space with an Underscore character as shown below.
SalesForce will automatically give you some default VisualForce markup to work with as shown below.
<apex:page>
  <!-- Begin Default Content REMOVE THIS -->
 <h1>Congratulations</h1>
  This is your new Page
  <!-- End Default Content REMOVE THIS -->
</apex:page>
And now save your page.
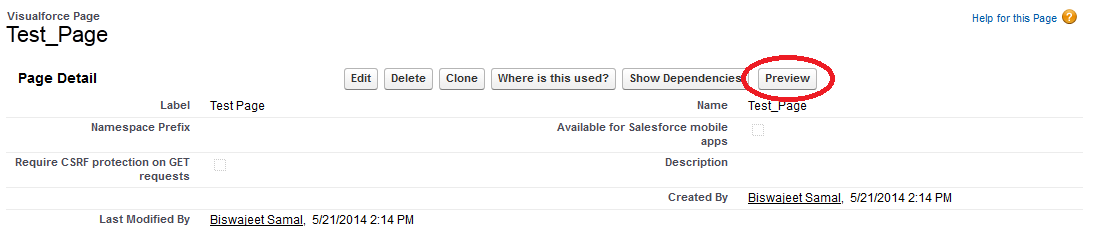
For preview click on preview button.
This website uses cookies to improve your experience. We'll assume you're ok with this, but you can opt-out if you wish.AcceptReject