The Process Builder is a workflow tool that helps to easily automate the business processes by providing a powerful and user-friendly visual representation of the process as we build it. The Process Builder user interface has several functional areas that we should understand before creating a process.
This feature is available, as Beta, since Winter ’15 (Release Notes) and Generally Available since Spring ’15 (Release Notes). It available in Enterprise, Performance, Unlimited, and Developer Editions.
For example here is a scenario: Automatically create an Opportunity upon the creation of a Account for which Type = “Customer – Direct”
Step 1:
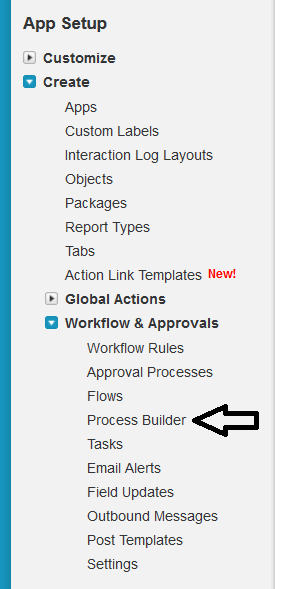
Go to Setup | App Setup | Create | Workflow & Approvals | Process Builder.
Step 2:
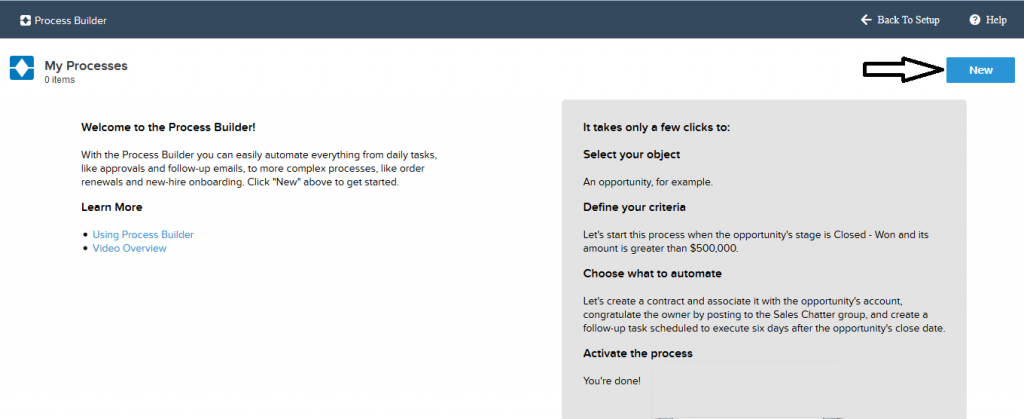
Review Process Builder start page and click ‘New” to start building.
Step 3:
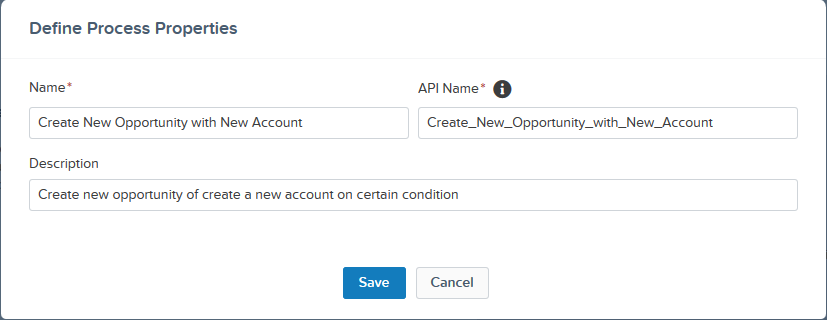
Create new process.
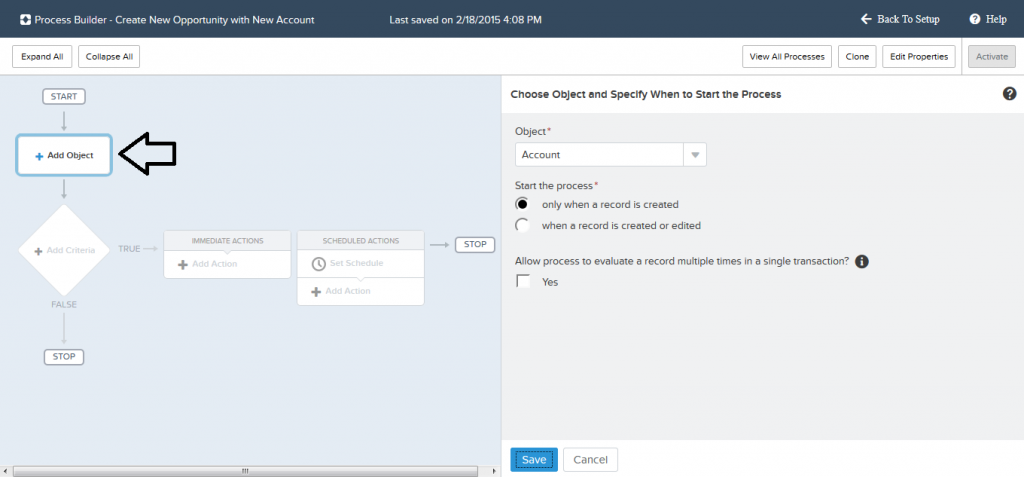
Step 4:
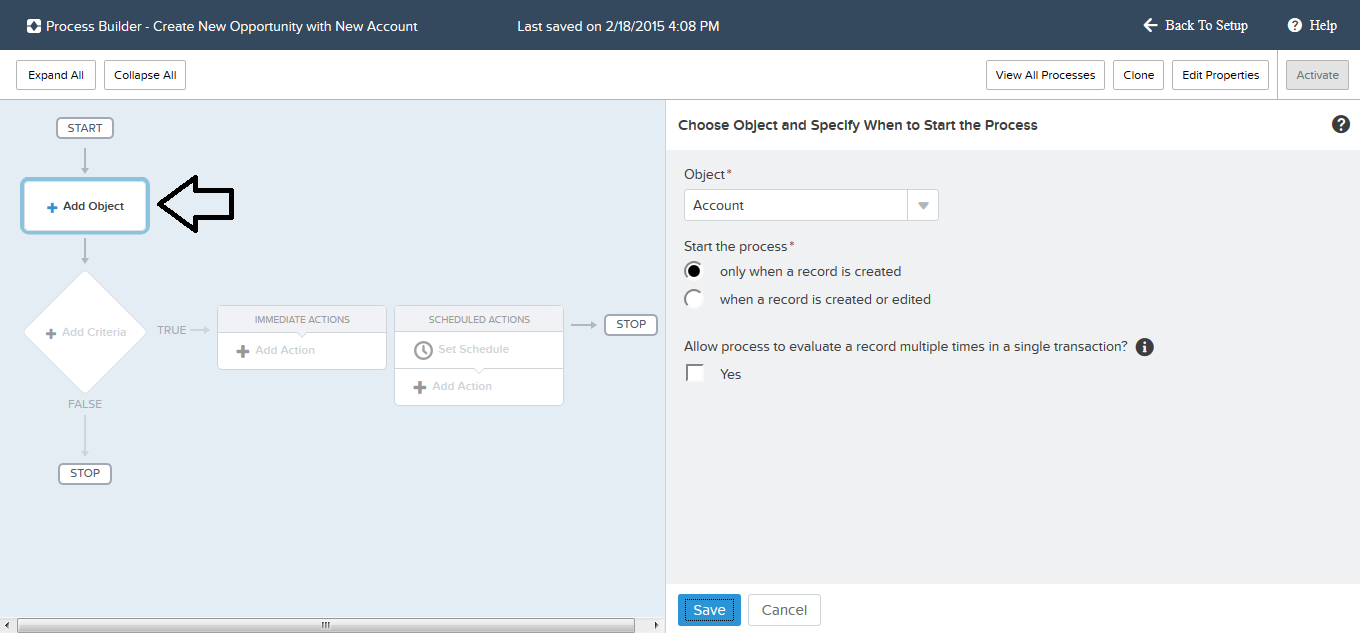
Select the object to be evaluated (in this case, Account).
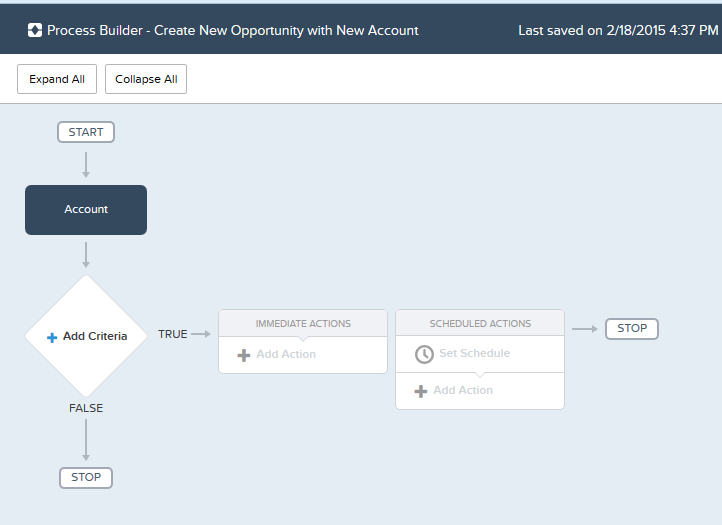
Step 5:
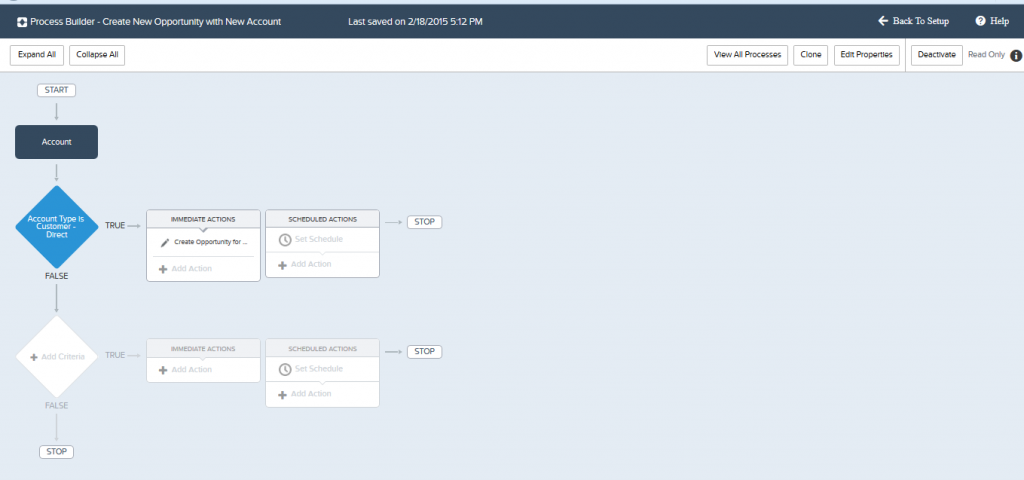
Review current process after object added.
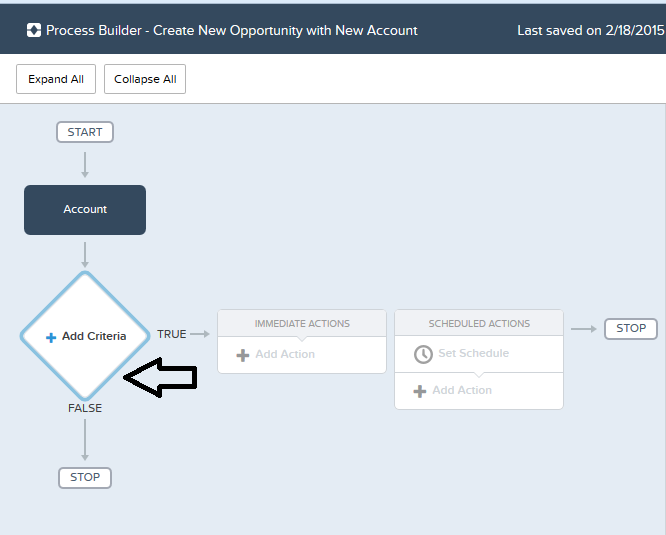
Step 6:
Add criteria that will determine when action(s) will be triggered.
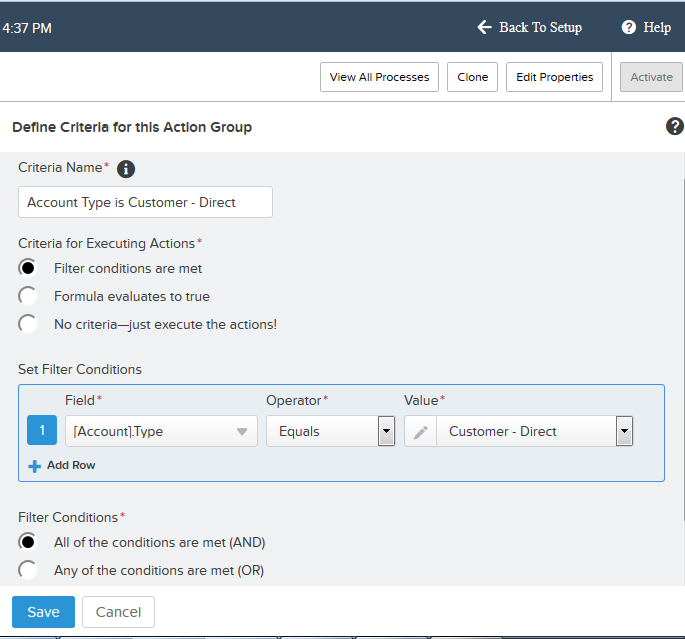
Step 7:
Name the criteria and select when actions should be evaluated.
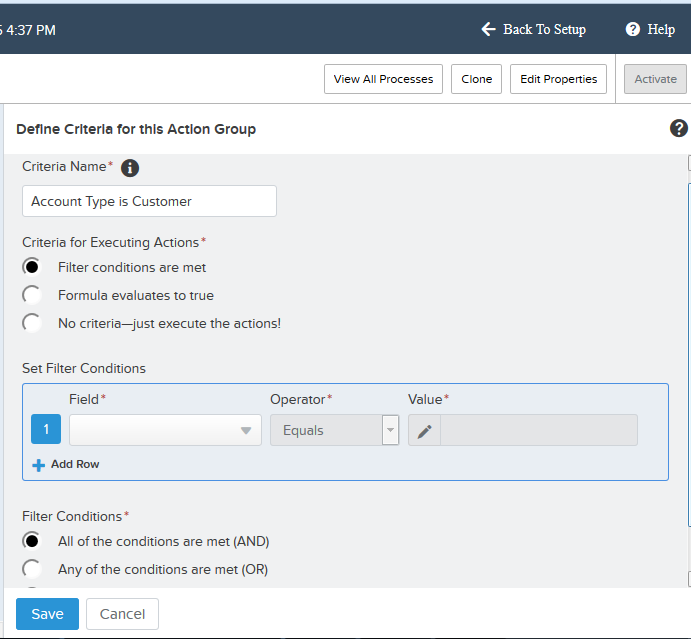
Step 8:
Create filter condition.
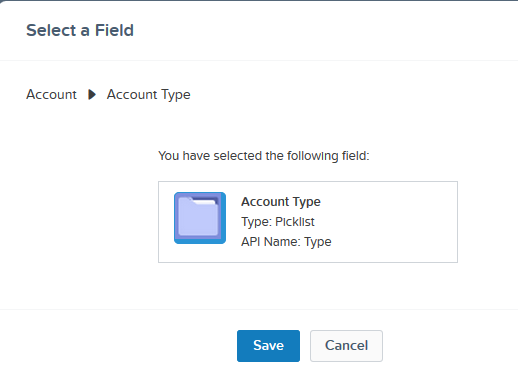
Step 9:
Apply filter value (Type = “Customer – Direct”) and review your filter.
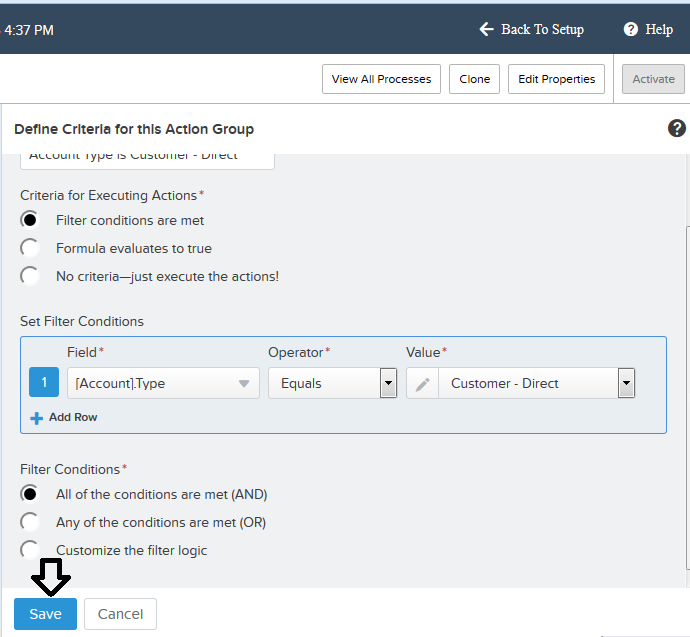
Step 10:
Save filter criteria.
Step 11:
Add a corresponding action.
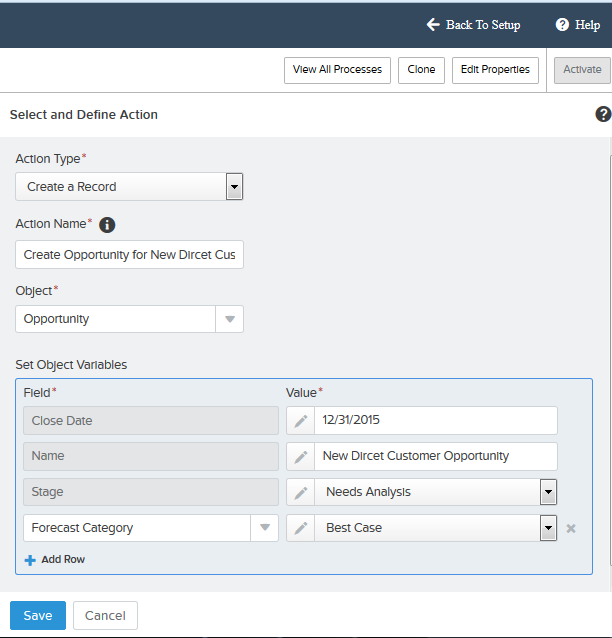
Step 12:
Fill the action name and the required fields for the new Opportunity record.
Step 13:
Activate the process by clicking on “Activate” at the top right.

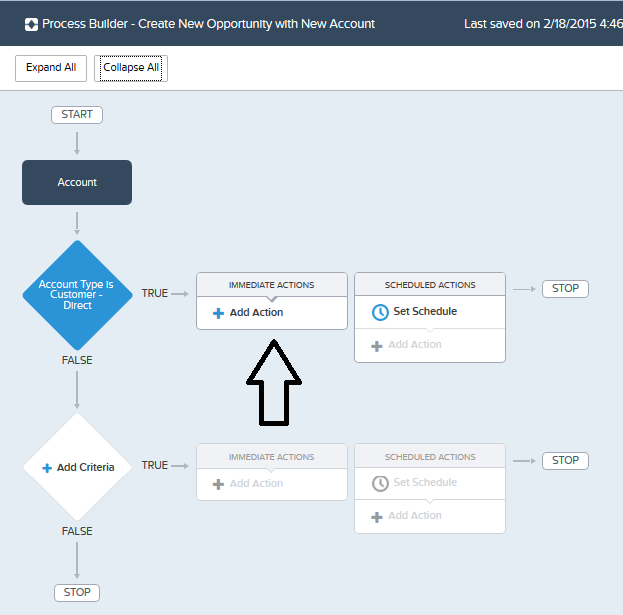
Review activated process.
Review all of your processes by navigating to “My Processes”.

Now you can create an account with type value “Customer – Direct”, and check automatically an Opportunity will create.