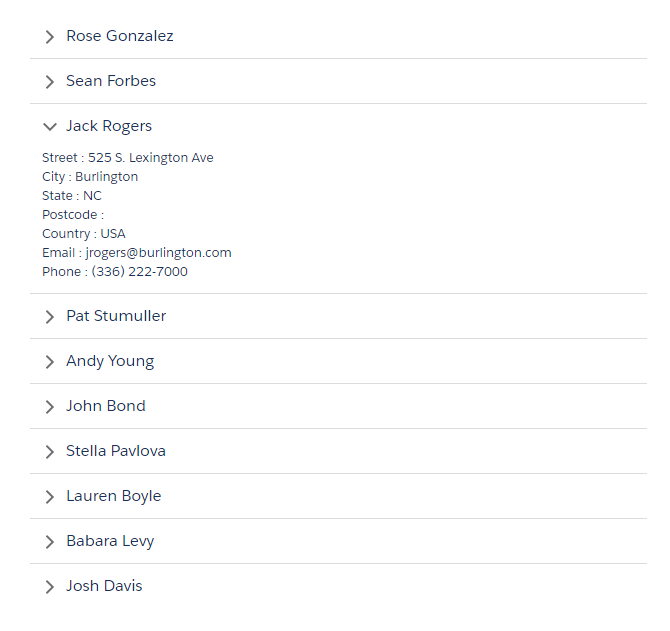
lightning:accordion component groups related content in a single container. Only one accordion section is expanded at a time. When you select a section, it’s expanded or collapsed. Each section can hold one or more Lightning components.
Here is an example of Lightning Accordion. I’m retrieving a list of contacts from Salesforce and populating into the Lightning Accordion.
Apex Controller:
public class AccordionAuraController {
    @AuraEnabled
    public static List<Contact> getContacts(){
        List<Contact> contactList = new List<Contact>();
        contactList = [SELECT Id, Name, Email, Phone, MailingStreet, MailingCity, MailingState, MailingPostalCode, MailingCountry From Contact LIMIT 10];
        return contactList;
    }
}
Note: The first section in the lightning:accordion is expanded by default. To change the default, use the activeSectionName attribute in lightning:accordion component. This attribute is case-sensitive. If two or more sections use the same name and that name is also specified as the activeSectionName, the first section is expanded by default.
In Live Agent, sometimes we need to pass some values from the page, where Start Chat button is located, to pre-chat form.
To achieve this, liveagent.addCustomDetail() function can be used to set the values. On pre-chat form page, liveagent.details.preChatInit() function can be used to access those details.
Here is the sample code to pass values from chat button to pre-chat form. In below example I’m passing “FirstName” and “LastName” values to pre-chat form.
Start Chat Button Code:
<div>
    <img class="chatbutton" id="liveagent_button_online_5737F000000Tdus" style="display: none; border: 0px none; cursor: pointer" onclick="liveagent.startChat('5737F000000Tdus')" src="https://contactcenters-developer-edition.ap5.force.com/chat/resource/1510984682000/ChatOnline" />
    <img class="chatbutton" id="liveagent_button_offline_5737F000000Tdus" style="display: none; border: 0px none; " src="https://contactcenters-developer-edition.ap5.force.com/chat/resource/1510983523000/ChatOffline" />
</div>
<script type="text/javascript">
    if (!window._laq) {
        window._laq = [];
    }
    window._laq.push(function() {
        liveagent.showWhenOnline('5737F000000Tdus', document.getElementById('liveagent_button_online_5737F000000Tdus'));
        liveagent.showWhenOffline('5737F000000Tdus', document.getElementById('liveagent_button_offline_5737F000000Tdus'));
    });
</script>

<script type='text/javascript' src='https://c.la1-c1-ukb.salesforceliveagent.com/content/g/js/41.0/deployment.js'></script>
<script type='text/javascript'>
    liveagent.init('https://d.la1-c1-ukb.salesforceliveagent.com/chat', '5727F000000TijS', '00D7F000003EL75');//Set First Name
	//Set First Name
    liveagent.addCustomDetail('FirstName', 'Biswajeet');
	//Set Last Name
    liveagent.addCustomDetail('LastName', 'Samal');
    liveagent.setName('Biswajeet');
</script>
Pre-Chat Form Page:
    <script type='text/javascript' src='https://d.la1-c1-ukb.salesforceliveagent.com/content/g/js/36.0/prechat.js'></script>
    <script type="text/javascript">
        //Get Custom Details data
        function ChatCallBack(Object) {
            for (var i = 0; i < Object.customDetails.length; i++) {

                if (Object.customDetails[i].label == 'FirstName') {
                    //Get First Name
                    console.log(Object.customDetails[i].value);
                }
                if (Object.customDetails[i].label == 'LastName') {
                    //Get Last Name
                    console.log(Object.customDetails[i].value);
                }
            }
        };
        liveagent.details.preChatInit('https://d.la1-c1-ukb.salesforceliveagent.com/chat', 'ChatCallBack');
    </script>
In Live Agent, sometimes we need to pass some values from the page, where Start Chat button is located, to Pre-chat form.
To achieve this, we use liveagent.addCustomDetail() function to set the values. On Pre-chat form page, we use prechat.js and liveagent.details.preChatInit() function to access those details.
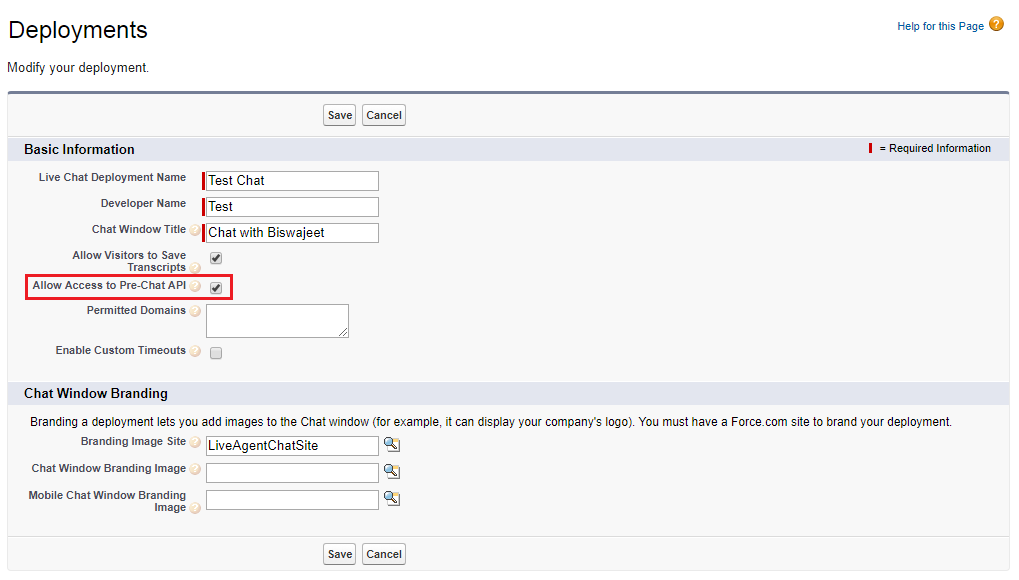
But if the “Allow Access to Pre-Chat API” in deployment is not enable, then we will face “Prechat API is not enabled by the specified deployment” JavaScript error.
Follow below steps to enable it.
Go to Setup || Customize || Live Agent || Deployments || Edit or Create your Deployment || Enable “Allow Access to Pre-Chat API” || Save
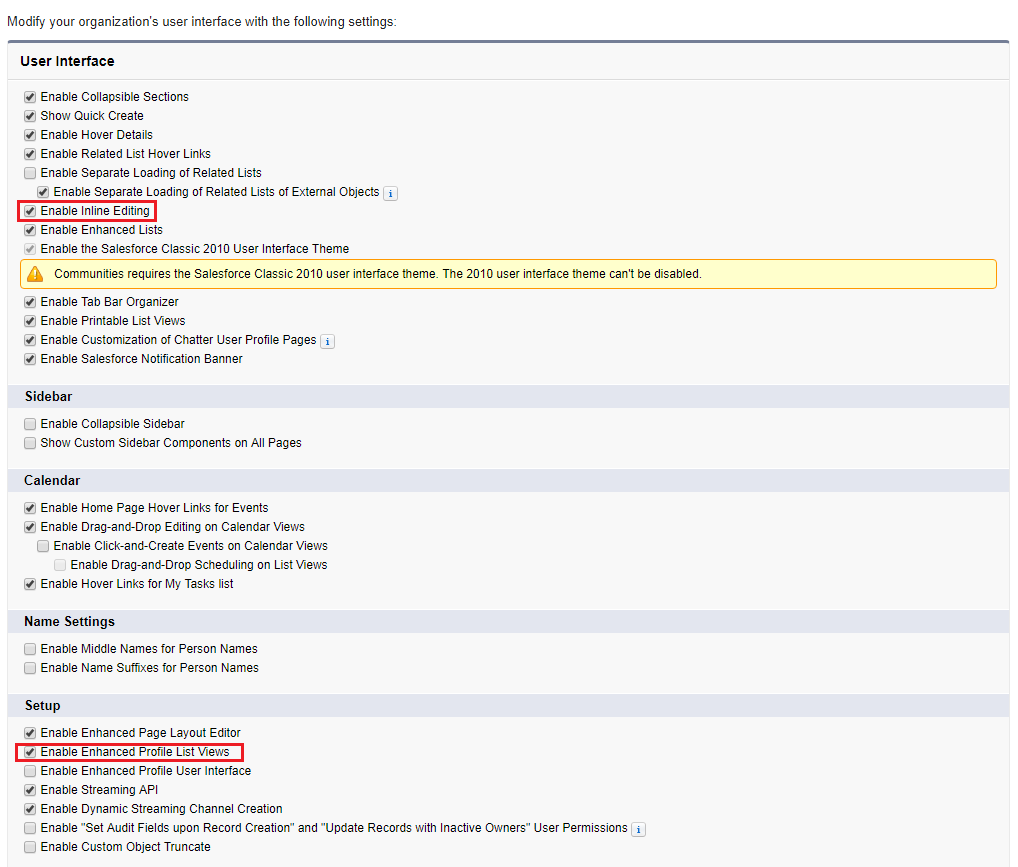
As a Salesforce Admin, Sometimes we need to edit multiple profiles to give permission to objects or system permission. Editing the profile one by one is a time-consuming work. But we can edit up to 200 profiles by enabling “Enable Enhanced Profile List Views” in our Org, without accessing individual profile pages.
Go to Setup || User Interface || Enable “Enable Inline Editing” and “Enable Enhanced Profile List Views” as shown in below image.
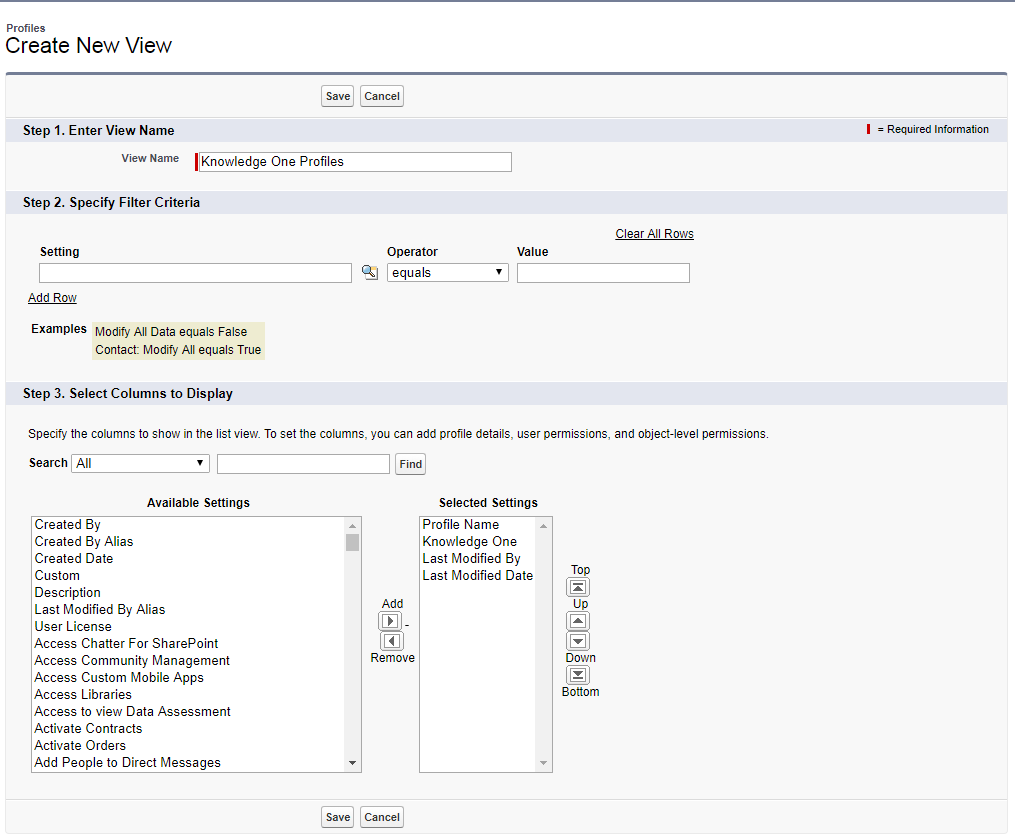
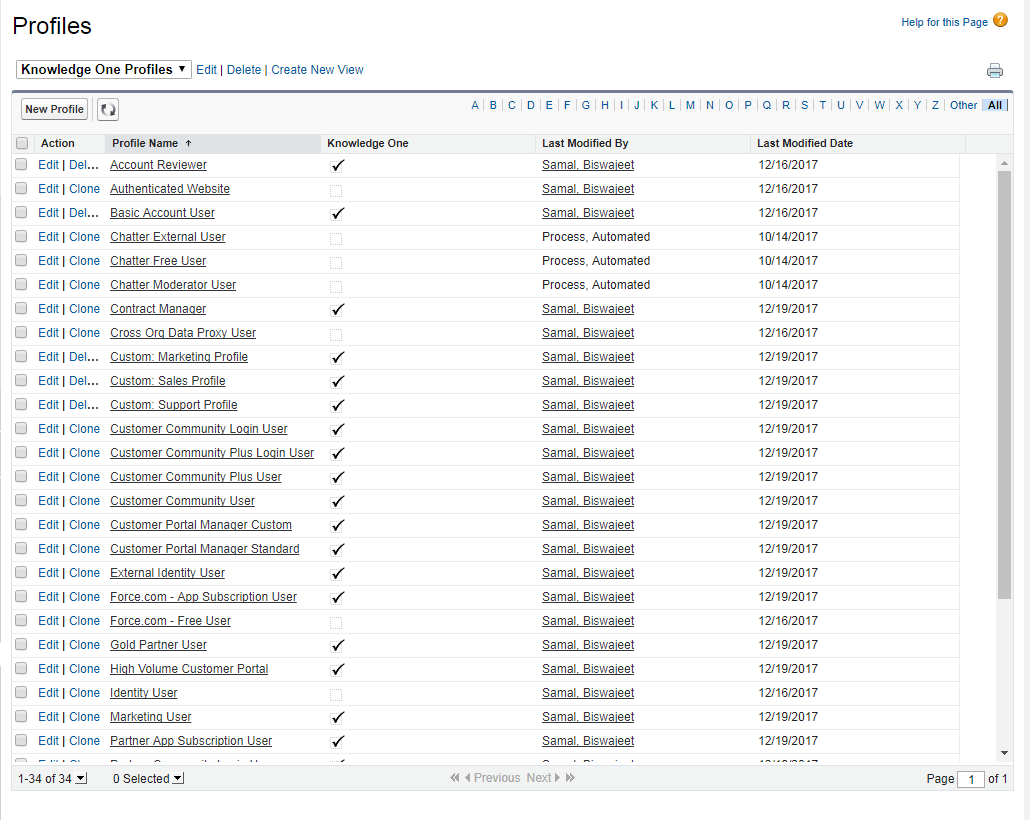
Now select or create a new list view that includes the profiles and permissions you want to edit.
Your profile list view will look something like below image. Editable cells display a pencil icon when you hover over the cell, while non-editable cells display a lock icon. In some cases, such as in standard profiles, the pencil icon appears but the setting is not actually editable.
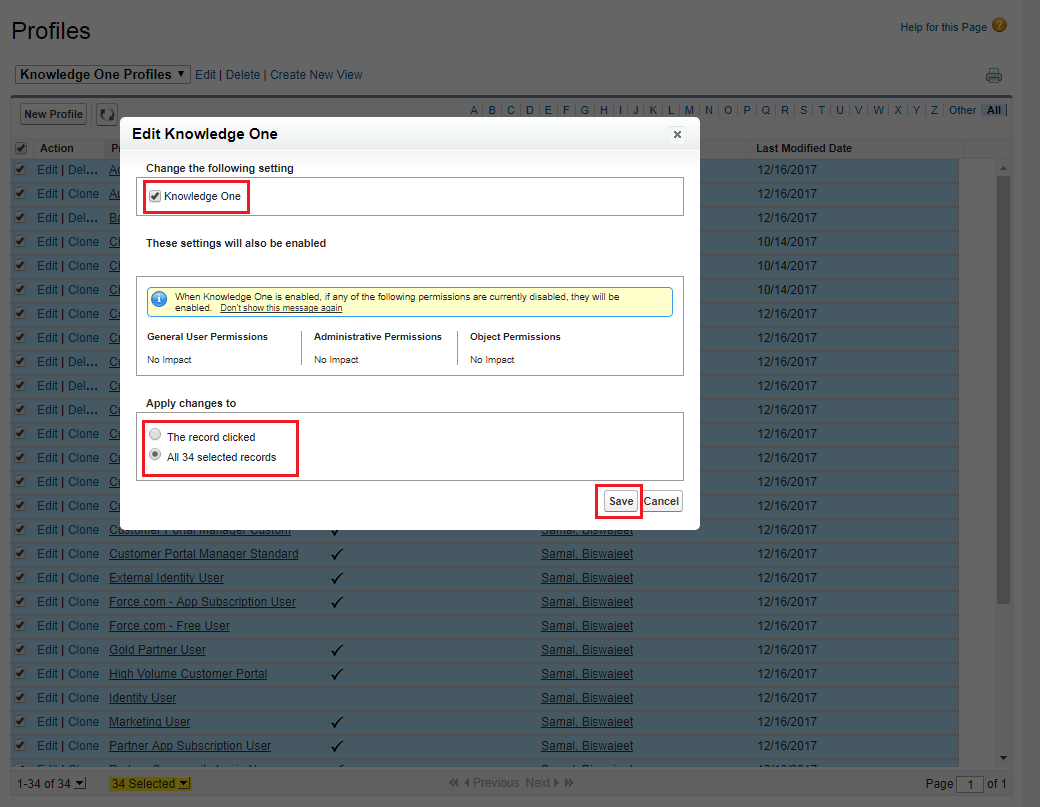
Now to edit multiple profiles, select the checkbox next to each profile you want to edit. Double-click the permission you want to edit. To change multiple profiles, select All n selected records (where n is the number of profiles you selected). Click Save.